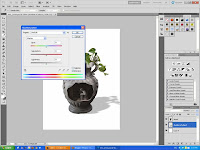
1. Get ready the background layer. In this case, it is plain white.
2. Add a new layer with the cut out. In this case, I chose a vase.
3. Duplicate the cut out layer and move it below the previous layer (shadow always falls behind).
The fun part:
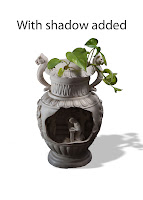
4. On the shadow layer, press Control U to bring out Hue/Saturation Adjustment. Move the Lightness slider all the way to the left to make it dark. Reduce opacity to 25% or as desired. Add Gaussian Blur to the shadow layer using Filter>Blur>Gaussian Blur.
5. Still on the shadow layer, distort the shadow using Edit>Transform>Distort.


No comments:
Post a Comment